Getting started
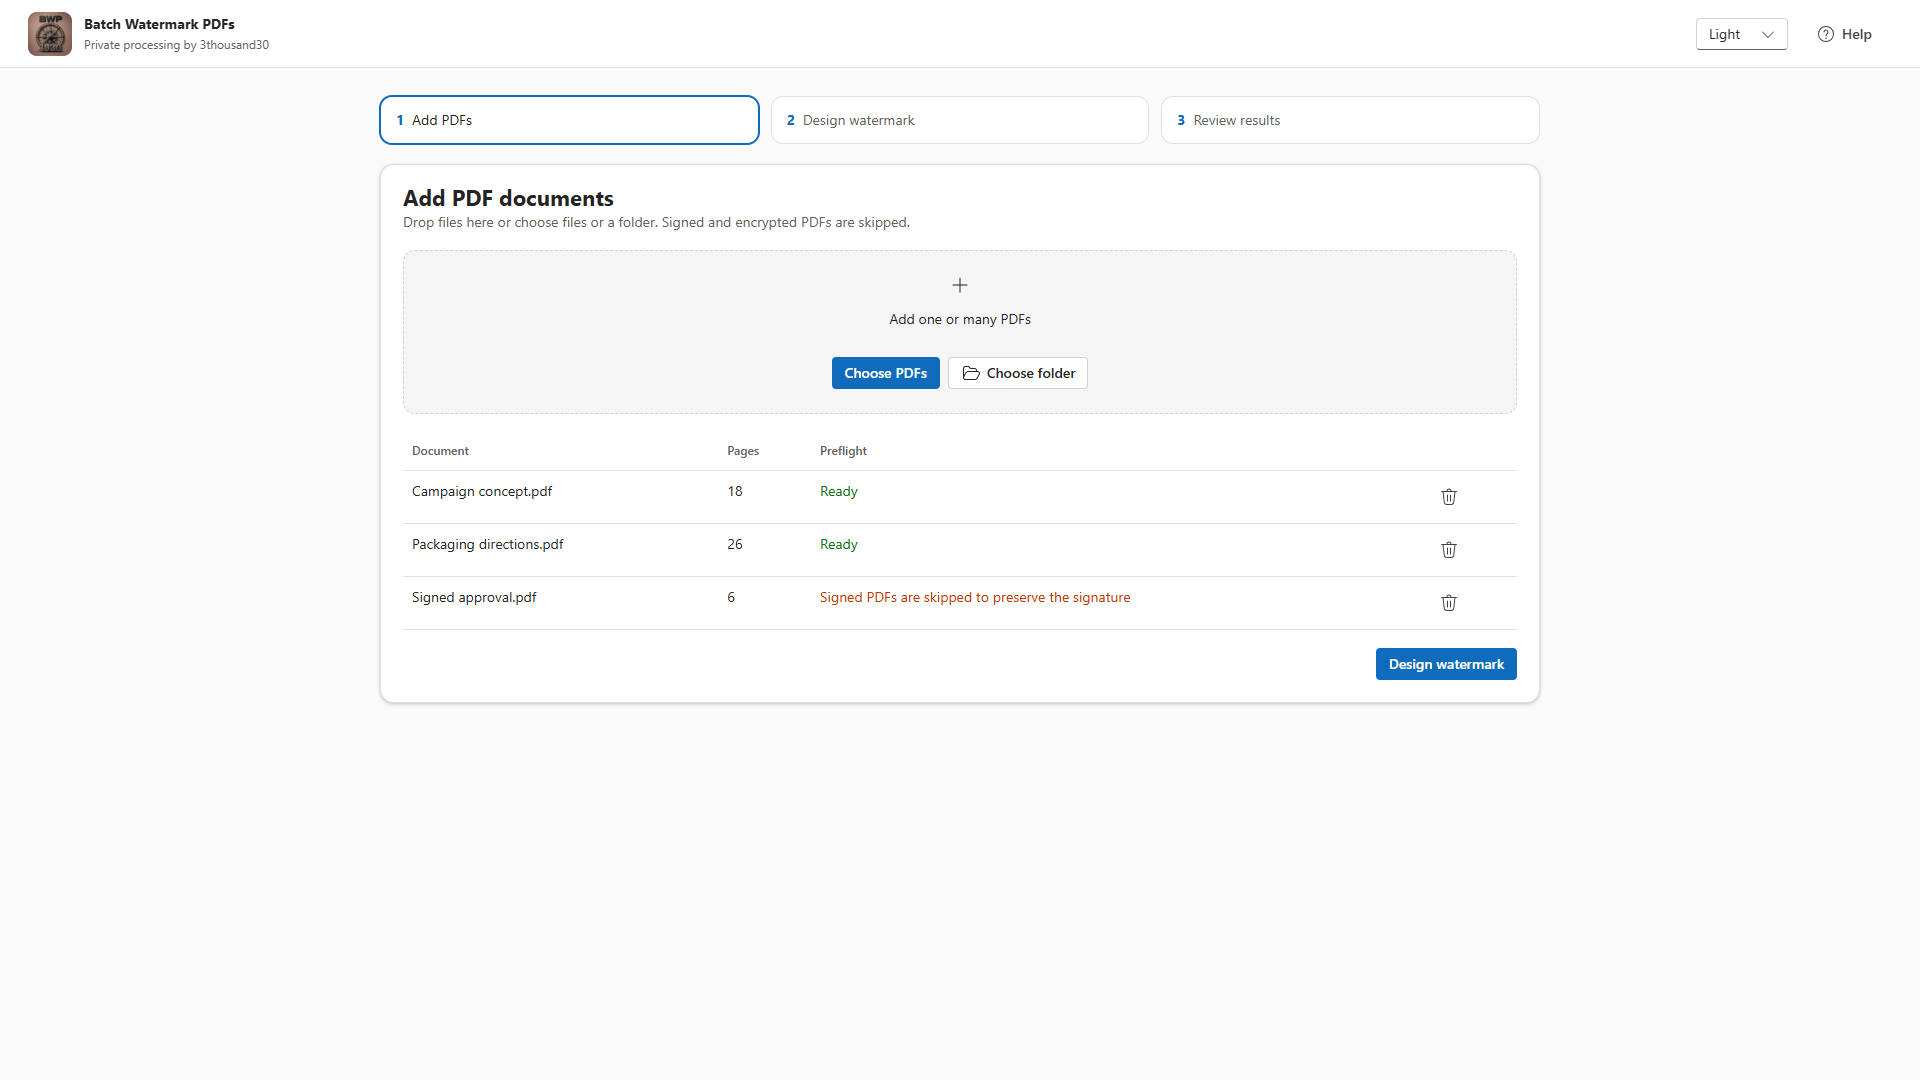
1. Add PDFs
Add PDF files or choose a folder. The app runs preflight checks and flags files that should not be modified, including encrypted, signed, malformed, or unsupported documents.
2. Build the watermark
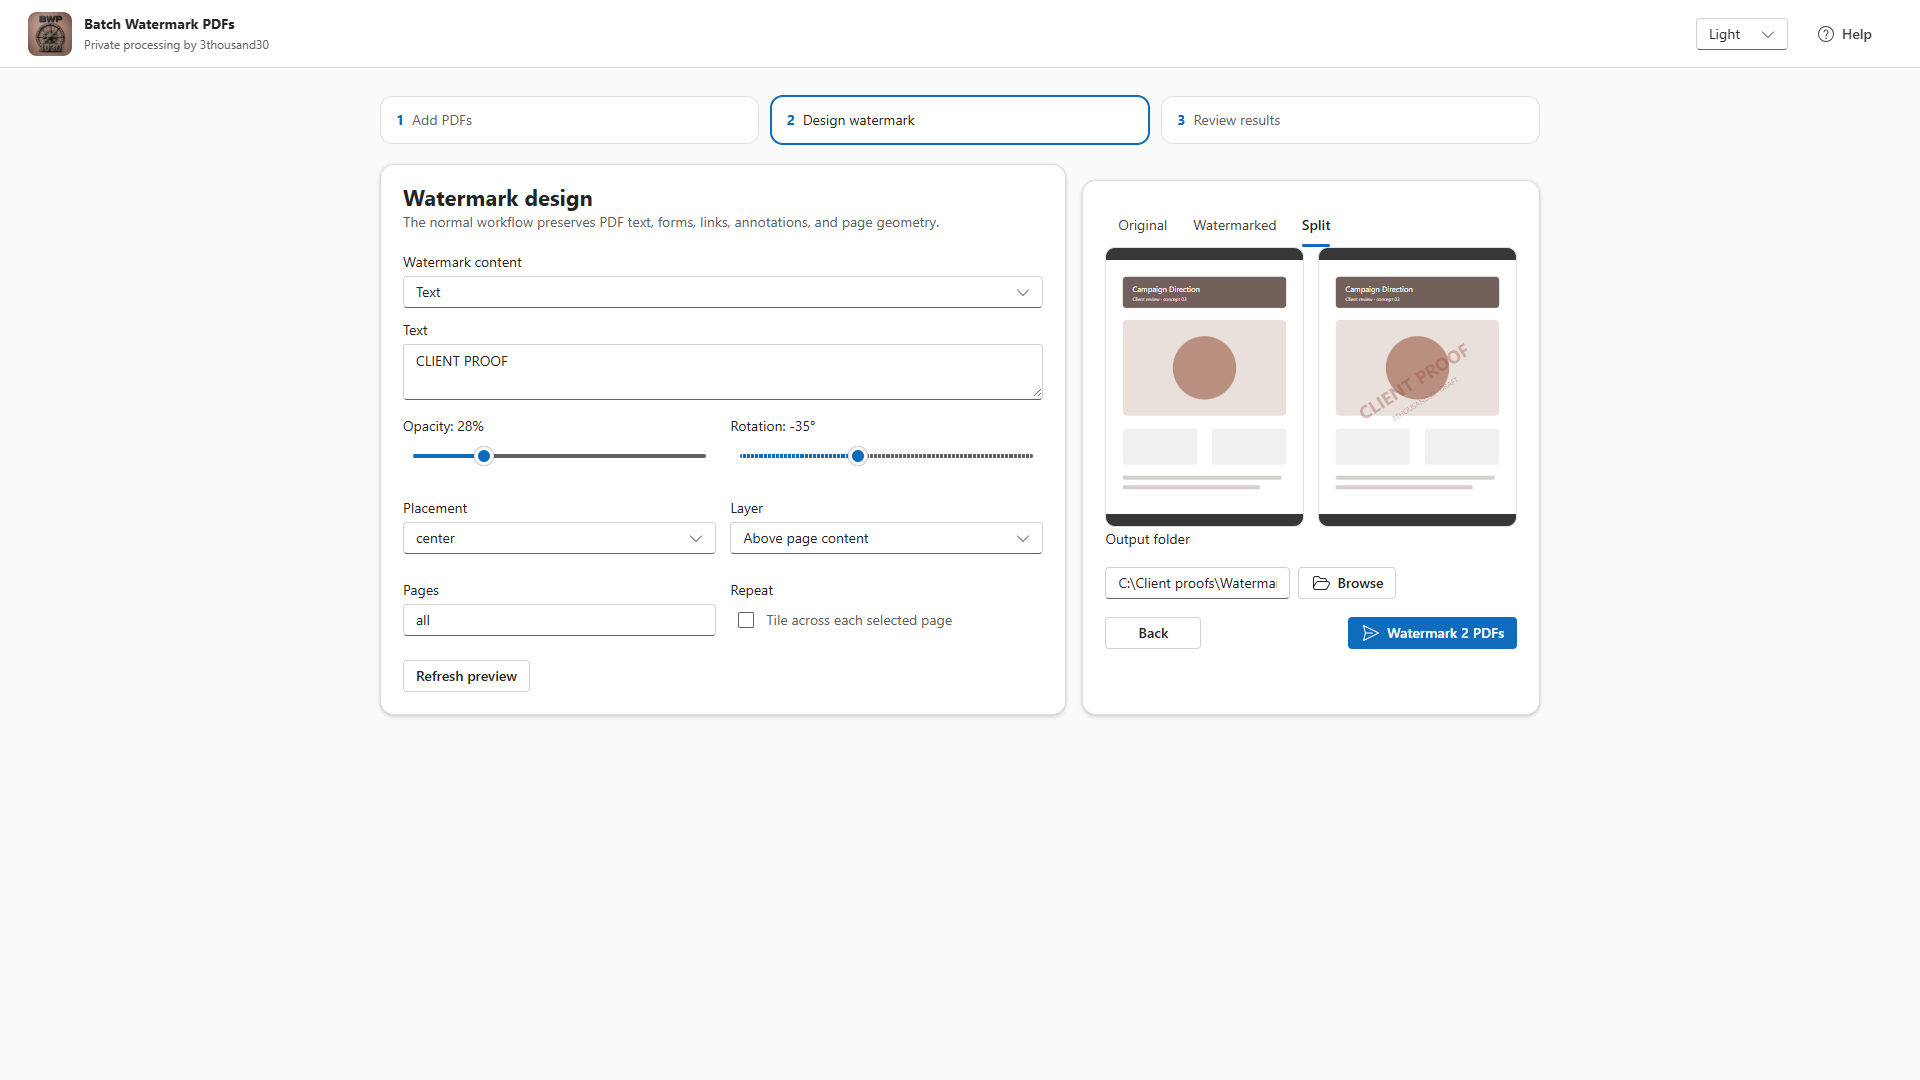
Choose a text watermark, a PNG/JPEG image watermark, or a combined text-and-image mark. Keep reusable marks simple and readable; heavy marks can distract from the document content.
3. Position and preview
Set placement, rotation, opacity, edge margin, text color, scale, tiling, page ranges, and whether the mark appears above or below existing content. The Original, Watermarked, and Split preview updates live as you adjust settings, so you can check the result before processing the whole batch.
4. Choose output settings
Choose an output folder and review the collision rule. Inputs are never overwritten directly; completed files receive safe output names.
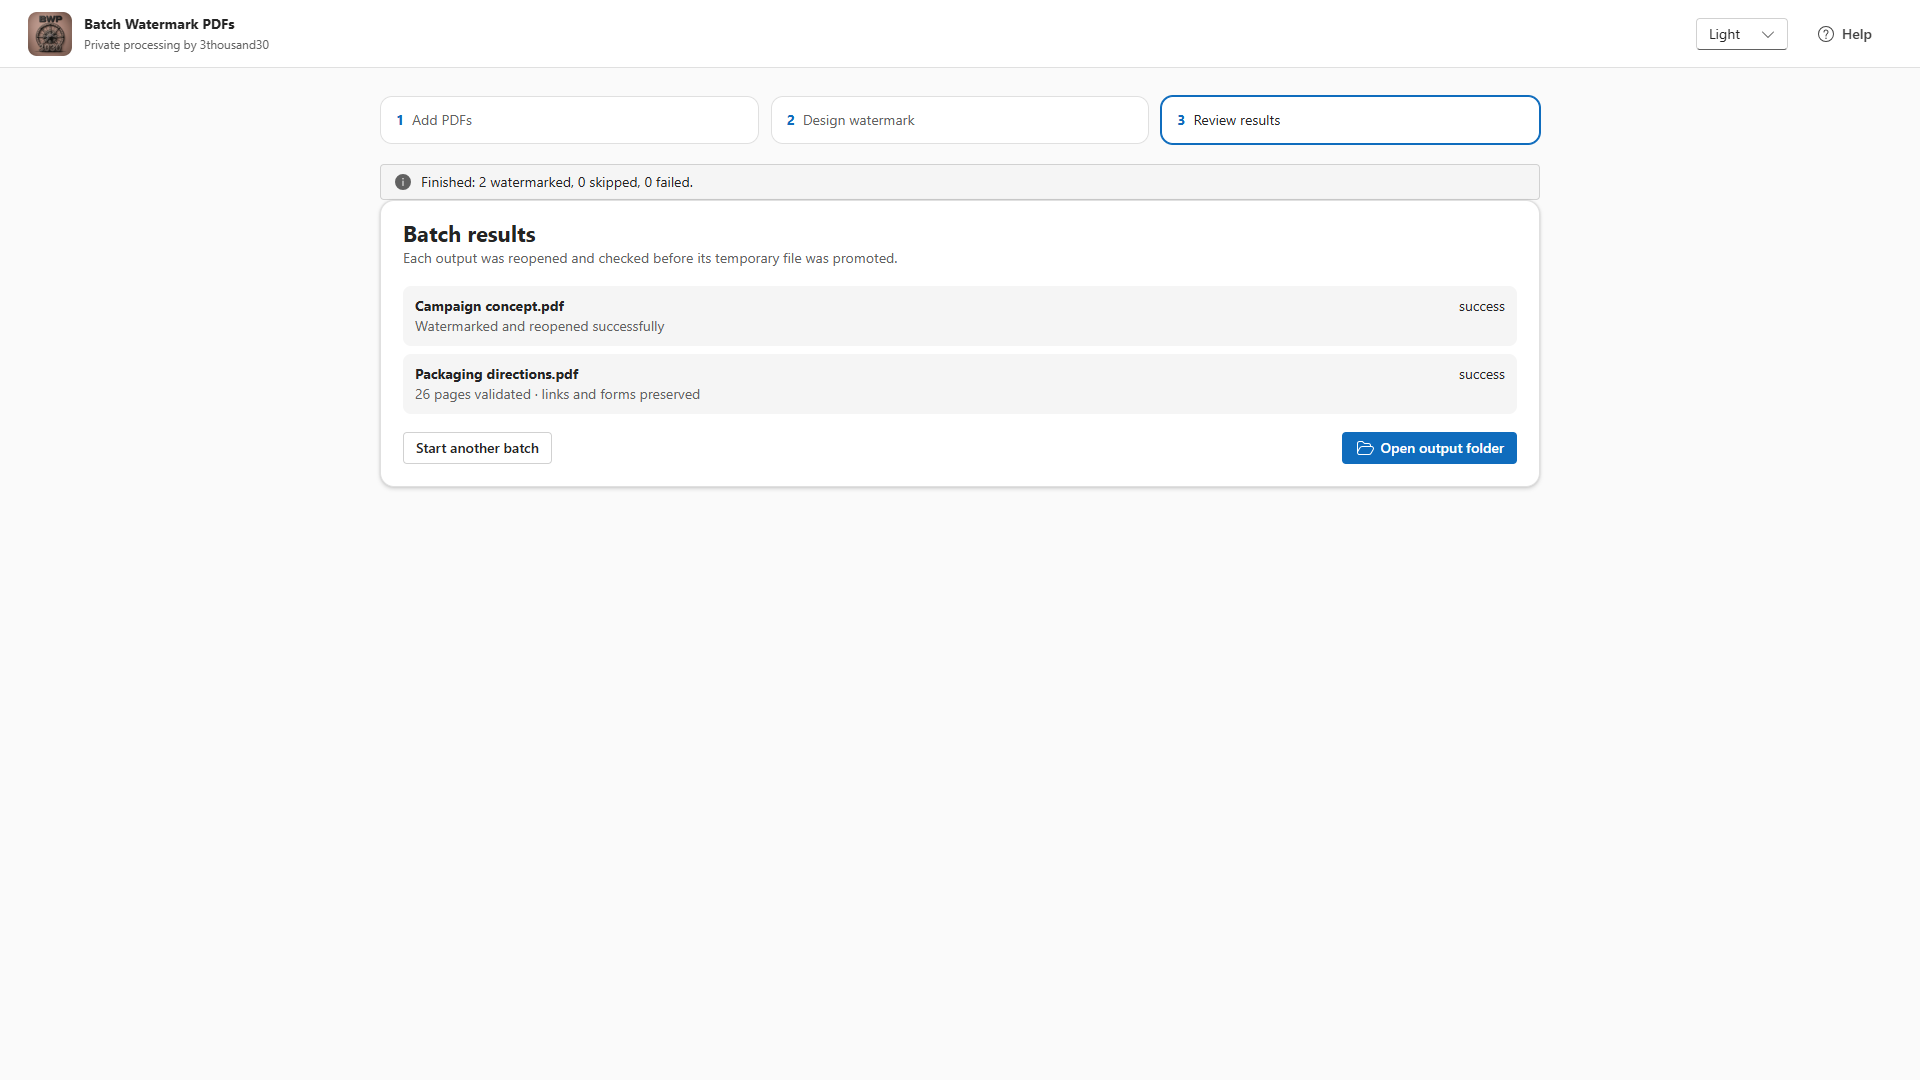
5. Run and review
Start the batch, cancel if needed, and review each result. Successful outputs are reopened for validation before the temporary file is promoted.